Emre Husmen Photoshop Rendering Tutorial
Emre Husmen has incredible vehicular designs. He currently resides in Toronto, Canada and is 22 years old. A lot can be learn from his rendering techniques using Photoshop CS3. Check out more or Emre's work over at his DeviantArt Gallery. Enjoy his tutorial on rendering a Mercedes-Benz LC concept.
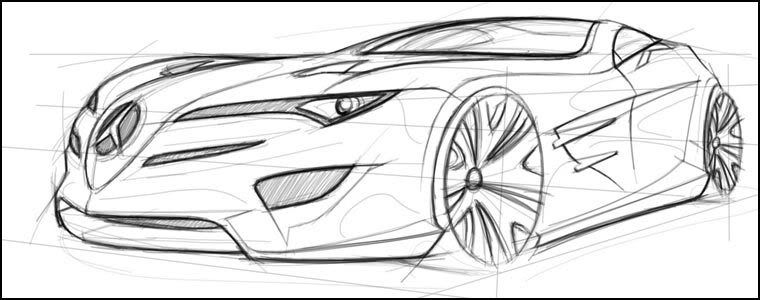
First of all, open your sketch on Adobe Photoshop and make it 2000 pixels wide. I usually work in high resolutions, because it allows me to create high quality renderings.
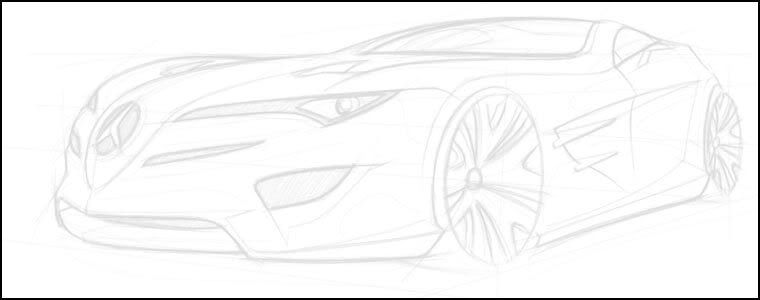
Open a new layer on your sketch and fill it with white colour. Make it's opacity about 85%.
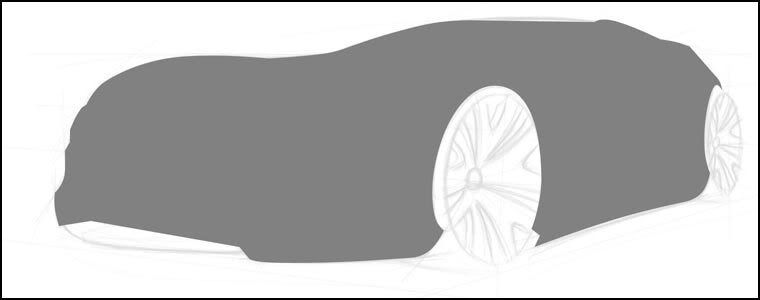
Let's start with selecting the body shape. I always use Pen Tool for that. Select the shape, open a new layer, fill it with grey tone. And try to keep your paths for future usage.

Select window shapes, open a new layer and fill it with black.
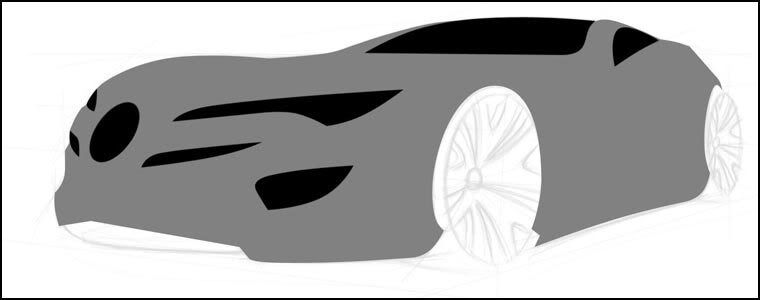
Do the same thing for front grills.
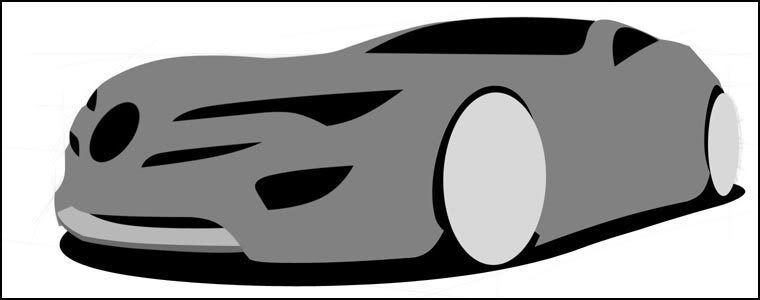
Make wheel ellipses above the body layer and put shadow under all of them.
Select the headlights and chrome parts (separate layers). Fill them with white.

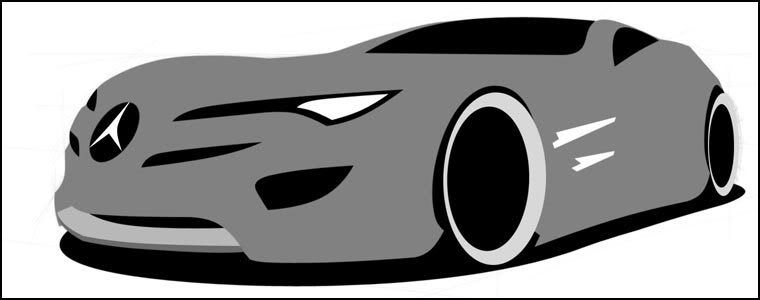
Select the basic body parts and fill them with darker or lighter grey depending on where are they facing.
 Create more body details with the same grey tones.
Now, start using the Dodge and Burn Tools! Use 200-300 px "airbrush" with 20-40% exposure. Darken the lower parts and lighten the upper parts. Also select a part on the windows for shining; open a new layer above the window layer and use a white airbrush to fill it a little bit (do not fill it all). Darken the headlight.
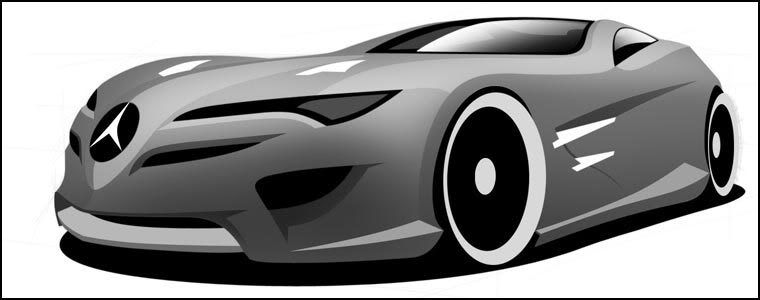
 Find some nice rims from reference pictures (or you can create your own). Cut and paste it above the body layer and play with its colour and contrast. Select an ellipse on headlight layer and fill it with white. Give it some outer glow effect. Colourize the windows from Hue/Saturation menu (press CTRL + U).
 Make a simple background with black and white gradients.
 Decide where the light will come from. Duplicate your rims two times, each, use the ellipse layers under the rims and create your tires with using Dodge and Burn Tools.
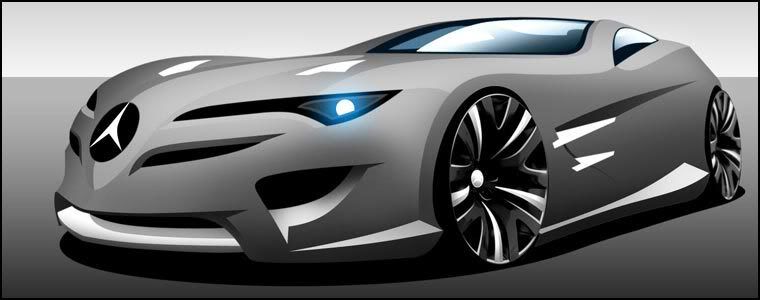
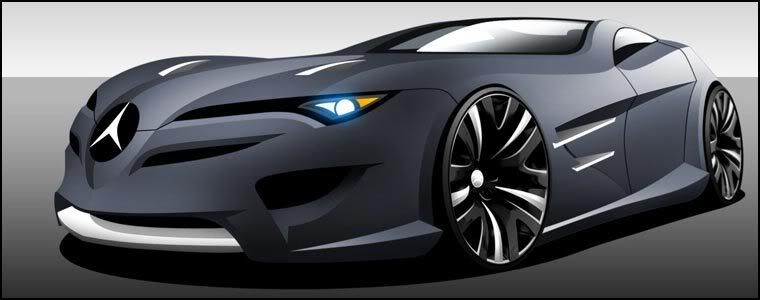 Colorize the body with a matt tones (use the Hue/Saturation menu).
 Put more details on your design. And now it's time to give some shining to your car. Open a new layer on the body layers; select & airbrush it with white. Complete everything except your final body color. Merge layers from the lowest body layer to the top. Keep the shadow and background layers separate.
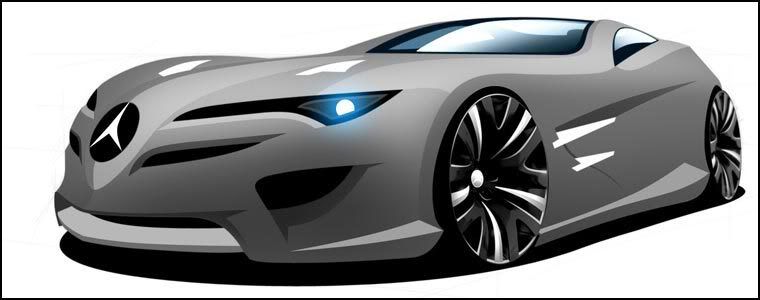
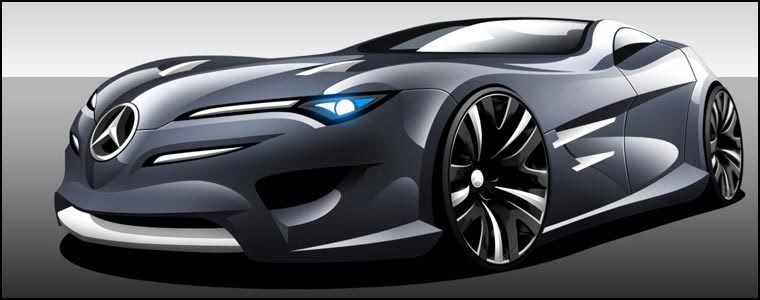
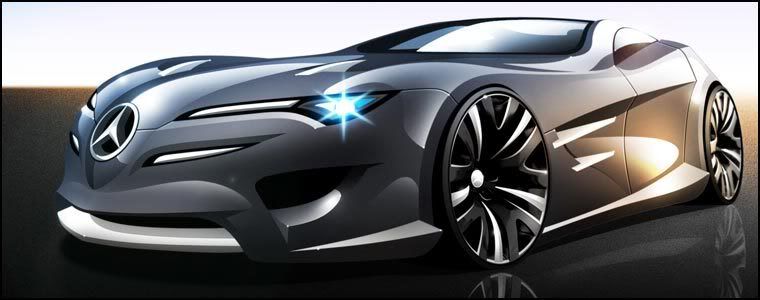 Duplicate the "merged layers" two times. Colorize them with blue and yellow tones (separately). Now, you have to use airbrush eraser to remove the mixed parts of those colors. Use the "overlay" effect (under the layer effects menu) for both of them. Put some white dots on the edges to make the shining more realistic (on another layer). Lastly give some reflections to the car and the background with layer effects menu.
First of all, open your sketch on Adobe Photoshop and make it 2000 pixels wide. I usually work in high resolutions, because it allows me to create high quality renderings.
Open a new layer on your sketch and fill it with white colour. Make it's opacity about 85%.
Let's start with selecting the body shape. I always use Pen Tool for that. Select the shape, open a new layer, fill it with grey tone. And try to keep your paths for future usage.
Select window shapes, open a new layer and fill it with black.
Do the same thing for front grills.
Make wheel ellipses above the body layer and put shadow under all of them.
Select the headlights and chrome parts (separate layers). Fill them with white.
Select the basic body parts and fill them with darker or lighter grey depending on where are they facing.
Create more body details with the same grey tones.Now, start using the Dodge and Burn Tools! Use 200-300 px "airbrush" with 20-40% exposure. Darken the lower parts and lighten the upper parts. Also select a part on the windows for shining; open a new layer above the window layer and use a white airbrush to fill it a little bit (do not fill it all). Darken the headlight.
Find some nice rims from reference pictures (or you can create your own). Cut and paste it above the body layer and play with its colour and contrast. Select an ellipse on headlight layer and fill it with white. Give it some outer glow effect. Colourize the windows from Hue/Saturation menu (press CTRL + U).Make a simple background with black and white gradients.Decide where the light will come from. Duplicate your rims two times, each, use the ellipse layers under the rims and create your tires with using Dodge and Burn Tools.Colorize the body with a matt tones (use the Hue/Saturation menu).Put more details on your design. And now it's time to give some shining to your car. Open a new layer on the body layers; select & airbrush it with white. Complete everything except your final body color. Merge layers from the lowest body layer to the top. Keep the shadow and background layers separate.Duplicate the "merged layers" two times. Colorize them with blue and yellow tones (separately). Now, you have to use airbrush eraser to remove the mixed parts of those colors. Use the "overlay" effect (under the layer effects menu) for both of them. Put some white dots on the edges to make the shining more realistic (on another layer). Lastly give some reflections to the car and the background with layer effects menu.


Comment Form under post in blogger/blogspot